 Light
Light Grey
Grey Natural
 Dark
Dark White
White Light
Light Grey
Grey Natural
 Dark
Dark Black
Black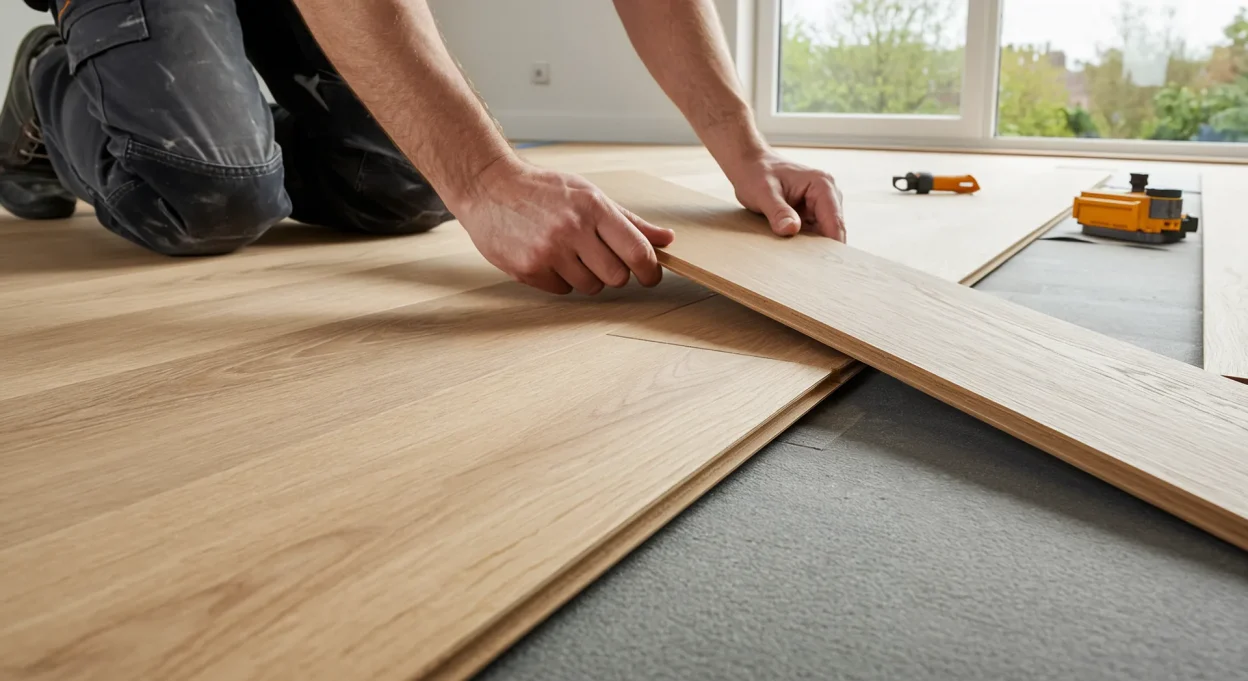
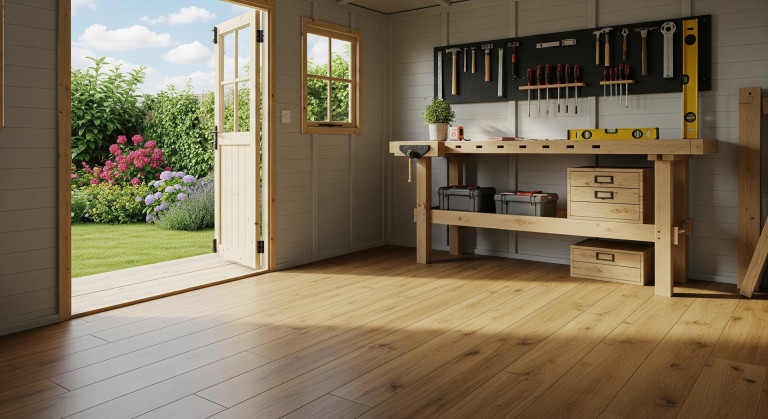
Engineered wood flooring offers the timeless beauty of real wood combined with enhanced stability and versatility, making it a hugely popular choice for UK homes. Learning how to lay engineered wood flooring yourself can be a rewarding DIY project, saving you money and giving you immense satisfaction. While it requires careful planning and attention to detail, particularly regarding subfloor preparation and expansion gaps, achieving a professional-looking result is definitely achievable.
This comprehensive guide provides step-by-step instructions, tips, and crucial considerations specifically tailored for laying engineered wood flooring in the UK. Whether you’re opting for a straightforward click-lock floating floor or considering the more traditional glue-down method, we’ll walk you through the process from initial planning to the final finishing touches. Get ready to transform your space!
Jump to Section:
- What is Engineered Wood Flooring & Why Choose It for Your UK Home?
- Floating vs. Glue-Down: Choosing Your Installation Method
- Plan Like a Pro: Essential Prep Before You Lay a Single Plank
- Tools of the Trade: Gathering Your Engineered Flooring Kit
- Subfloor Secrets: Preparing Concrete & Wooden Bases (UK Focus)
- Underneath It All: Selecting & Installing Underlay (Floating Floors)
- How to Lay Engineered Wood Flooring: The Floating Floor Method (Step-by-Step)
- How to Lay Engineered Wood Flooring: The Glue-Down Method (Step-by-Step)
- The Finishing Touches: Skirting, Trims, and Thresholds
- Avoid DIY Disasters: Common Mistakes When Laying Engineered Wood
- First Steps on Your New Floor: Initial Aftercare
- Is DIY Installation Right for You?
What is Engineered Wood Flooring & Why Choose It for Your UK Home?
Before diving into how to lay engineered wood flooring, let’s quickly understand the material. Unlike solid wood, which is one piece of timber, engineered wood consists of multiple layers:
- Top Layer (Veneer): A slice of real hardwood (like oak, walnut, ash) providing the visible beauty and texture.
- Core Layers: Multiple layers of plywood, HDF (High-Density Fibreboard), or softwood bonded together, typically running in different directions (cross-ply construction).
- Backing Layer: Provides stability and sometimes moisture resistance.
This construction gives engineered wood significant advantages, especially relevant for UK homes:
- Stability: Less prone to expanding, contracting, warping, or cupping with changes in humidity and temperature compared to solid wood. This makes it more suitable for varying UK conditions.
- Underfloor Heating (UFH) Compatibility: Most engineered wood flooring is suitable for use with underfloor heating systems (always check manufacturer specifics!), a popular heating choice in the UK.
- Versatility: Can often be installed in areas where solid wood isn’t recommended, like basements or kitchens (with appropriate precautions).
- Installation Options: Can typically be installed as a floating floor (click-lock) or glued down.
Floating vs. Glue-Down: Choosing Your Installation Method
There are two primary methods for installing engineered wood flooring:
Floating Floor (Click-Lock System):
- The planks interlock using a tongue-and-groove ‘click’ system.
- The entire floor ‘floats’ over an underlay, not fixed directly to the subfloor.
- Pros: Easier and faster for DIY, requires less subfloor perfection, allows for natural movement, easy plank replacement, underlay provides cushioning/sound insulation.
- Cons: Can feel slightly less solid underfoot than glue-down, requires underlay cost, needs careful attention to expansion gaps.
- This is the most common and recommended method for DIY installations.
Glue-Down Floor:
- Planks are adhered directly to the subfloor using a specialist flooring adhesive.
- Pros: Feels very solid underfoot, no need for underlay (though adhesive costs apply), ideal for large areas or where maximum stability is needed (e.g., conservatories).
- Cons: Requires a perfectly level and prepared subfloor, installation is slower and messier, requires specific adhesive knowledge, harder plank replacement, often best left to professionals.
This guide will detail how to lay engineered wood flooring using both methods, focusing more heavily on the DIY-friendly floating floor installation.
Plan Like a Pro: Essential Prep Before You Lay a Single Plank
Thorough planning prevents headaches later. Don’t skip these crucial pre-installation steps:
- Measure Accurately: Calculate the room’s area (Length x Width = m²).
- Order Materials: Order your engineered wood flooring, adding 10-15% extra to the calculated area for cutting waste (complex room shapes or patterns like herringbone may need slightly more). Check all packs are from the same batch number for colour consistency. Order underlay, adhesive (if gluing), trims, and any necessary DPM (Damp Proof Membrane) at the same time.
- Acclimatisation: This is VITAL in the UK’s variable climate. Leave the unopened boxes of flooring lying flat in the room where they will be installed for at least 48-72 hours (check manufacturer’s specific guidance). This allows the wood to adjust to the room’s ambient temperature and humidity, preventing excessive expansion or contraction after laying. Do not stack boxes directly on concrete.
- Read Instructions: Always read and follow the specific instructions provided by your engineered wood flooring manufacturer – they supersede any general advice.
Tools of the Trade: Gathering Your Engineered Flooring Kit
Having the right tools makes laying engineered wood flooring much smoother:
- Tape Measure & Pencil
- Safety Glasses & Gloves
- Knee Pads
- Utility Knife
- Spacers (for expansion gaps – usually 10-12mm for engineered wood)
For Floating Floors:
- Underlayment (+ Damp Proof Membrane if needed)
- Tape (for underlay seams)
- Saw (Hand saw, jigsaw, mitre saw, or laminate/wood floor cutter for clean cuts)
- Tapping Block (use one designed for engineered wood or a scrap piece)
- Rubber Mallet
- Pull Bar (essential for locking the last plank in a row)
For Glue-Down Floors:
- Appropriate Flooring Adhesive (flexible wood adhesive recommended)
- Notched Trowel (correct size as specified by adhesive manufacturer)
- Adhesive Remover Wipes/Solvent
- Heavy Floor Roller (often 45-70kg)
General:
- Carpenter’s Square / Combination Square
- Level (long spirit level or laser level)
- Broom / Vacuum Cleaner
- Moisture Meter (for subfloor checks)
- Tools for removing skirting/trim (pry bar, hammer)
- Tools for undercutting door frames (multi-tool or hand undercut saw)
Subfloor Secrets: Preparing Concrete & Wooden Bases (UK Focus)
The most critical step in how to lay engineered wood flooring successfully is subfloor preparation. A poor subfloor guarantees a poor result.
General Checks (Both Concrete & Wood):
- Clean: Thoroughly sweep and vacuum. Remove any paint, plaster, old adhesive etc.
- Dry: Check for moisture. Concrete subfloors in the UK often require a Damp Proof Membrane (DPM). Use a moisture meter – readings should typically be below 75% RH for concrete and <12-14% MC for wood (check flooring manufacturer limits). Address any leaks or damp issues before proceeding.
- Level: This is crucial. Use a long straight edge or level across the floor. Deviations should generally be no more than 2-3mm over a 2-metre span. Unevenness will cause engineered planks to flex, squeak, and potentially damage the locking system over time.
- Sound: Ensure the subfloor is solid, with no loose boards or crumbling concrete.
Concrete Subfloors:
- If uneven, use a suitable self-levelling compound following the manufacturer’s instructions. Allow it to cure fully.
- Always install a DPM unless your underlay has one integrated and your moisture readings are definitively low (better safe than sorry in the UK). This can be a liquid DPM or polyethylene sheeting (minimum 1000 gauge/0.25mm).
Wooden Subfloors (Floorboards/Chipboard):
- Screw down any loose boards securely to prevent squeaks.
- Replace any damaged or rotten boards.
- Sand down any high spots or joints.
- If uneven, overlaying with flooring-grade plywood (minimum 6mm, screwed down securely every 150-200mm) is often the best solution to create a smooth, flat surface. Do not use hardboard.
- Consider if a DPM is needed (e.g., over a damp crawl space – consult building regulations).
Underneath It All: Selecting & Installing Underlay (Floating Floors)
For floating installations, underlay is essential. It provides:
- Cushioning and comfort underfoot.
- Sound insulation (reducing impact noise).
- Support for the click-lock joints.
- Minor subfloor imperfection smoothing.
- Thermal insulation.
- Moisture protection (if it includes an integrated DPM).
Types:
- Foam/PE Foam: Basic, affordable option. Often comes with DPM backing.
- Fibreboard: Good levelling properties, excellent sound and thermal insulation. Not suitable for high moisture areas.
- Cork: Natural, excellent sound/thermal insulation, durable. Higher cost.
- Rubber/High-Density Foam: Premium options offering superior sound reduction and comfort. Often UFH compatible.
Choosing: Select an underlay suitable for engineered wood and your specific subfloor/needs (e.g., UFH compatible, built-in DPM for concrete). Do not use carpet underlay.
Installation:
- Lay the underlay perpendicular to the direction you plan to lay the flooring planks.
- Butt the edges together closely – do not overlap unless the product specifies an overlap strip.
- Tape the seams using waterproof tape (if required by the underlay type) to create a continuous layer and moisture barrier.
- Run the underlay slightly up the walls if it has a DPM layer.
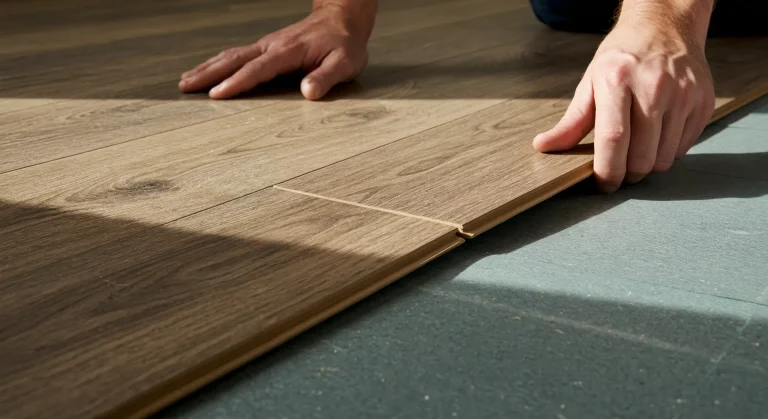
How to Lay Engineered Wood Flooring: The Floating Floor Method (Step-by-Step)
This is the most popular DIY method for installing engineered wood flooring.
- Plan Direction: Usually lay planks parallel to the longest wall or towards the main light source.
- First Row: Decide your starting wall. Most click systems require the groove side facing the wall. Place 10-12mm expansion spacers against the starting wall. Lay the first plank in a corner.
- Complete First Row: Click the short end of the next plank into the first, lowering it into place. Continue across the wall. Use the saw/cutter for the last piece, ensuring the cut-off piece is longer than ~300mm (check instructions). Remember the expansion gap at the end wall too.
- Start Second Row: Use the cut-off piece from the first row (if long enough) to start the second row. This automatically staggers the joints. Joints must be staggered between rows (minimum ~300-400mm offset recommended) for strength and appearance. If the cut-off is too short, start with a new plank cut roughly to 1/3 or 2/3 length.
- Connect Rows: Angle the long edge tongue of the second-row plank into the groove of the first row plank. Lower it gently while ensuring the short end clicks securely into the previous plank in its own row. Use the tapping block and mallet gently on the long edge if needed to close gaps – never hit the plank directly.
- Continue Across Floor: Repeat the process, maintaining staggered joints and the expansion gap around the entire perimeter (walls, pipes, door frames, kitchen islands etc.).
- Obstacles:
– Door Frames: Undercut the bottom of the frame/architrave using a multi-tool or hand saw (use a flooring offcut as a height guide). Slide the plank underneath for a neat finish.
– Pipes: Drill a hole slightly larger than the pipe diameter. Cut from the hole to the edge of the plank. Fit the plank, then glue the cut-off piece back in place behind the pipe. Use pipe surrounds (rosettes) to cover the expansion gap. - Final Row: Measure the remaining gap (minus expansion gap). You may need to cut planks lengthwise (rip cut). Use the pull bar and mallet carefully to lock the final row into place against the spacers.
- Remove Spacers: Once the floor is fully laid.
How to Lay Engineered Wood Flooring: The Glue-Down Method (Step-by-Step)
This method requires more skill and perfect subfloor prep.
- Final Subfloor Check: Ensure subfloor is perfectly clean, dry, level, and sound.
- Establish Starting Lines: Snap perpendicular chalk lines across the room’s centre point. These are crucial guides.
- Select Adhesive & Trowel: Use a high-quality flexible wood flooring adhesive recommended by the flooring manufacturer. Use the exact notched trowel size specified by the adhesive maker – this ensures the correct amount of glue is applied.
- Spread Adhesive: Working in small, manageable sections (e.g., 1-2 m² at a time) along your starting lines, spread the adhesive evenly using the notched trowel held at the correct angle (usually 45°). Do not cover your lines. Pay attention to the adhesive’s ‘open time’.
- Lay First Planks: Carefully place the first planks into the wet adhesive along your guidelines, pressing firmly. Ensure tongues and grooves engage correctly (they may not ‘click’ like floating floors). Check alignment meticulously.
- Continue Laying: Work outwards, spreading adhesive and laying planks section by section. Stagger joints as per floating floor method. Clean off any adhesive that squeezes onto the plank surface immediately using appropriate wipes/cleaner – dried adhesive is very difficult to remove.
- Cutting: Cut edge pieces carefully as needed. Apply adhesive near walls last.
- Weighting/Rolling: Once laid, use a heavy floor roller across the entire floor in multiple directions to ensure full contact between planks and adhesive, squeezing out air bubbles. Weighting sections with unopened boxes can also help initially.
- Curing Time: Keep off the floor entirely for the adhesive’s full curing period (check instructions – can be 24-72 hours or more).
The Finishing Touches: Skirting, Trims, and Thresholds
Once the floor is laid (and adhesive cured if glued):
- Floating Floor: Remove all expansion spacers.
- Install Skirting/Trim: Reinstall original skirting boards or fit new ones. Alternatively, use scotia trim (quadrant beading) fitted against existing skirting. Nail/pin the trim to the skirting board, not the floor, allowing the floating floor to move underneath.
- Threshold Strips: Use appropriate transition strips (e.g., T-bar, ramp, end profile) at doorways connecting to different floor types or levels, ensuring the expansion gap is maintained where necessary.
Avoid DIY Disasters: Common Mistakes When Laying Engineered Wood
- Poor Subfloor Prep: The #1 cause of problems. Don’t skimp on cleaning, levelling, or moisture control.
- No/Insufficient Expansion Gap: Essential for floating floors. Omitting it leads to buckling.
- No Acclimatisation: Laying cold/damp boards leads to issues later.
- Incorrect Underlay/DPM: Using the wrong type or omitting a needed DPM.
- Joints Not Staggered: Weakens the floor and looks unprofessional.
- Forcing Planks: Damaging the click-lock system. Use tapping block gently.
- Ignoring Manufacturer Instructions: Always follow their specific guidance.
First Steps on Your New Floor: Initial Aftercare
- Wait for adhesive to fully cure before heavy traffic or placing furniture (glue-down).
- Clean the floor thoroughly using recommended methods (sweep/vacuum, lightly damp mop with pH-neutral cleaner).
- Install felt pads on all furniture legs immediately.
- Use protective mats at entrances.
Is DIY Installation Right for You?
Laying engineered wood flooring via the click-lock method is achievable for many competent DIYers with patience and the right tools. Glue-down installations are significantly more demanding due to the critical subfloor requirements and adhesive work; professional help is often advised unless you have prior experience. Assess the scope, your subfloor condition, and your DIY confidence honestly before starting.
Conclusion
Learning how to lay engineered wood flooring empowers you to transform your home with a beautiful, durable, and stable floor. Success lies in meticulous planning, rigorous subfloor preparation, careful acclimatisation, and following instructions precisely – especially regarding expansion gaps for floating floors and adhesive application for glue-down methods. While the process demands care, the result of a professionally installed floor laid with your own hands is incredibly rewarding. Take your time, use the right tools and techniques outlined in this UK guide, and enjoy your stunning new engineered wood floor for many years.