 Light
Light Grey
Grey Natural
 Dark
Dark White
White Light
Light Grey
Grey Natural
 Dark
Dark Black
Black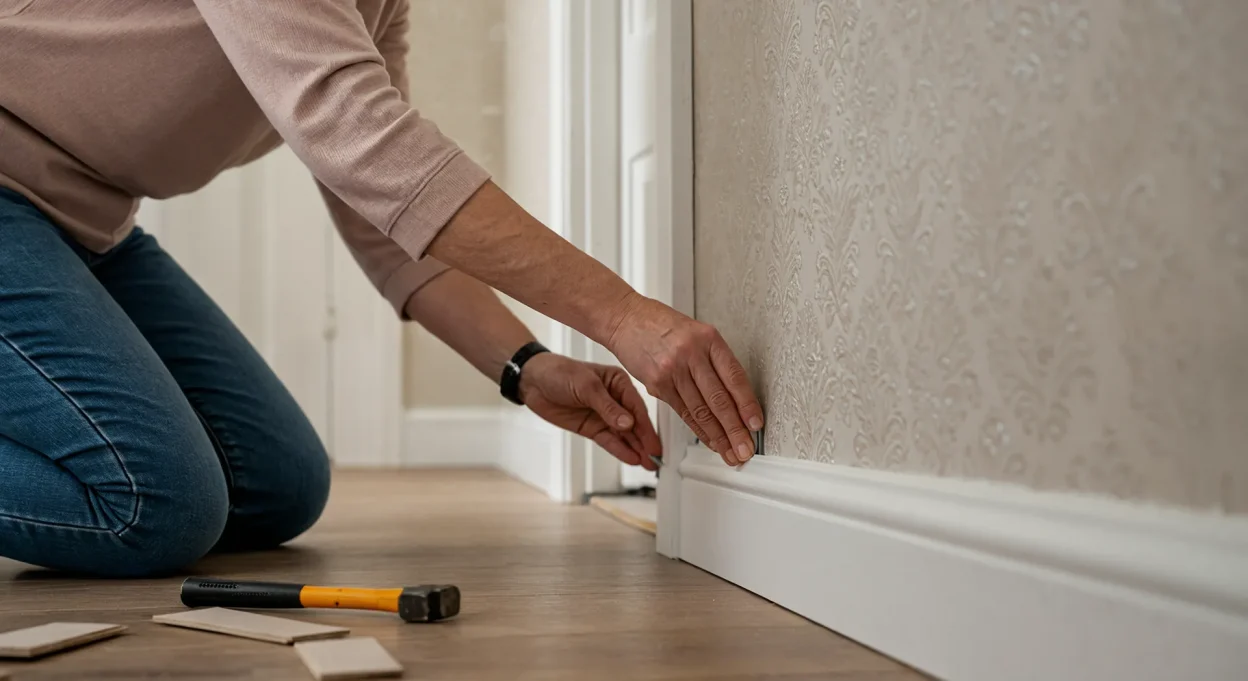
Skirting boards provide the perfect finishing touch to any room, but over time they can become damaged, chipped, or simply look dated. The traditional process of replacing them – ripping the old boards off the wall, potentially damaging the plaster, and starting from scratch – is a messy, time-consuming, and often daunting task. But what if there was a cleverer, quicker, and cleaner way? Enter skirting board covers.
This innovative solution, also known as “over skirting” or “cover skirting,” is designed to fit directly over your existing skirting boards, instantly concealing them and providing a fresh, modern finish. Learning how to fit skirting board covers is a fantastic project for UK DIY enthusiasts of all levels. It requires patience and precision but avoids the heavy-duty demolition of a full replacement.
This ultimate step-by-step UK DIY guide for 2025 will walk you through the entire process, from accurate measuring and choosing profiles to mastering cuts and achieving a professional-quality finish.
Jump to Section:
- Before You Start: Understanding Skirting Board Covers
- Planning & Measuring: The Key to Perfectly Fitted Skirting Board Covers
- Your Toolkit: Essential Tools & Materials for the Job
- The Main Event: How to Fit Skirting Board Covers Step-by-Step
- Achieving a Professional Finish: Filling, Caulking & Painting
- Common Mistakes to Avoid When Fitting Skirting Board Covers
- The Final Result: Enjoying Your New Skirting Board Covers!
Before You Start: Understanding Skirting Board Covers
Skirting board covers are specially moulded profiles with a hollowed-out back. This recess allows them to slot neatly over the top of your existing skirting boards. They are typically made from MDF (Medium-Density Fibreboard) and are widely available in the UK, often pre-primed and ready for a final coat of paint.
The main benefits are clear:
- No Removal Needed: You avoid the dust, noise, and potential wall damage of removing old skirting.
- Saves Time & Labour: Installation is significantly faster than a full replacement.
- Conceals Imperfections: Perfectly hides old, damaged skirting, unsightly paint jobs, or dated profiles.
- Hides Wires: The gap behind can be used to neatly conceal cables for TVs, speakers, or lamps.
- Modernises a Room: Instantly updates the look of your space with a fresh, clean profile.
Planning & Measuring: The Key to Perfectly Fitted Skirting Board Covers
This is the most critical stage. Inaccurate measurements will lead to wasted material and frustrating gaps.
1. Measure Your Existing Skirting:
You need two key measurements from your old skirting boards:
- Height: Measure from the floor to the very top edge of the skirting.
- Thickness (Depth): Measure from the wall to the outermost point of the skirting. This might be at the top of a detailed profile, so check carefully.
- Your cover skirting’s internal dimensions must be larger than these measurements. For example, if your old skirting is 120mm high and 18mm thick, you’ll need a cover with an internal recess of at least 121mm x 19mm. Always check the product specifications.
2. Choose Your Profile:
Cover skirting comes in all popular UK profiles. Modern styles include Square, Bullnose, and Chamfered. Traditional styles include Ogee and Torus. Choose one that suits your home’s aesthetic.
3. Calculate Quantity:
Use a tape measure to find the total length of all the walls in your room (the perimeter). Add 10-15% to this total to account for waste from cuts and potential mistakes. It’s always better to have too much than too little.
4. Acclimatise:
MDF skirting covers can expand and contract slightly. Leave the new boards lying flat in the room where they will be installed for at least 24-48 hours to acclimatise to the temperature and humidity.
Your Toolkit: Essential Tools & Materials for the Job
Measuring & Marking:
- Tape Measure
- Pencil
- Combination Square
Cutting:
- Mitre Saw: Highly recommended for fast, clean, and accurate angle cuts.
- Fine-Toothed Hand Saw & Mitre Box: A good budget alternative to a mitre saw for making accurate 45° cuts.
- Coping Saw: For the more advanced ‘scribed joint’ method on internal corners.
Fixing:
- Caulk Gun: For applying adhesive and decorator’s caulk.
- Nail Gun (Optional): A second-fix nail gun makes pinning the boards very fast.
- Hammer & Nail Punch: For manually driving in and recessing panel pins.
Materials:
- Skirting Board Covers
- Strong Grab Adhesive: Look for a high-strength, solvent-free adhesive (often labelled “instant grab,” “no more nails,” etc.).
- Panel Pins: 40-50mm length is usually sufficient to go through the cover, old skirting, and into the plaster.
- Decorator’s Caulk: For sealing the top edge.
- Wood Filler: For filling nail holes and joint gaps.
- Sandpaper (Fine-grit): For smoothing filler.
- Primer & Paint: If your covers are only primed.
The Main Event: How to Fit Skirting Board Covers Step-by-Step
With your planning and prep done, it’s time to start fitting.
Step 1: Prepare Your Workspace & Existing Skirting
Clear the room as much as possible. Run a vacuum along the top of your existing skirting boards to remove dust. Wipe them down with a cloth and sugar soap solution to ensure they are clean and grease-free for a good adhesive bond.
Step 2: Measuring & Making Your First Cuts
It’s best practice to start on the longest, most uninterrupted wall.
- Measure the length of the wall accurately.
- Transfer this measurement to your first piece of cover skirting.
- Using your mitre saw or hand saw, make a clean, straight 90° cut. Offer the piece up to the wall to check the fit. If joining two pieces on a very long wall, you can use a 45° mitre cut (a ‘scarf joint’) for a less visible join than a straight butt joint.
Step 3: Tackling Internal Corners (Mitre vs. Scribed Joints)
Internal corners are where precision counts. Older UK houses rarely have perfectly square 90° walls, which can make this tricky.
Method A: The Mitre Joint (Easier)
- Set your mitre saw or mitre box to a 45° angle.
- For the left-hand piece, make a 45° cut so the front face is longer than the back.
- For the right-hand piece, make an opposing 45° cut.
- When pushed together, these should form a 90° corner. Dry fit them first to check. If the wall isn’t perfectly square, you may have a small gap, which can be filled with caulk later.
Method B: The Scribed or Coped Joint (Advanced/Professional)
This method provides a perfect fit even on non-square walls.
- The first piece is cut with a square (90°) end and fitted tightly into the corner.
- The second piece is first cut with a 45° internal mitre (as above).
- Using a coping saw, you then carefully cut along the exposed edge of the profile created by the mitre cut.
- This creates a “negative” profile that will slot perfectly over the face of the first board, resulting in a tight, gap-free joint. This takes practice but yields superior results.
Step 4: Mastering External Corners
External corners are more straightforward and are always done with a mitre joint.
- Set your mitre saw or box to 45°.
- For the left-hand piece, make a 45° cut so the back face is longer than the front.
- Do the opposite for the right-hand piece.
- When pushed together, they will wrap neatly around the external corner.
Step 5: Fixing the Skirting Board Covers Securely to the Wall
This is a two-part process for a strong, instant bond.
- Take your cut piece of skirting cover. On the back, apply a generous zigzag bead of strong grab adhesive.
- Firmly press the cover into place over the old skirting board, ensuring it’s pushed tight against the wall and sitting level on the floor.
- To hold it securely while the adhesive cures, use panel pins. Hammer them through the thickest part of the cover skirting, through the old skirting, and into the wall behind. Place a pin every 30-40cm.
- Use a nail punch and hammer to tap the head of each nail just below the surface. This makes them invisible after filling.
Continue this measure, cut, and fix process around the room.
Achieving a Professional Finish: Filling, Caulking & Painting
This final stage is what elevates a good DIY job into a great one. Don’t rush it!
- Filling: Apply a small amount of wood filler into all the nail holes you created with the nail punch. Also, use filler or flexible caulk for any small gaps in your mitre joints.
- Sanding: Once the filler is completely dry, use fine-grit sandpaper (e.g., 120-grit) to lightly sand the filled areas until they are perfectly smooth and flush with the skirting.
- Caulking: This is a key pro tip. Apply a thin, neat bead of decorator’s caulk along the top edge of the skirting cover where it meets the wall. This hides any small, uneven gaps against the plaster for a seamless, integrated look. Smooth the bead with a wet finger or a caulk finishing tool. Also apply a fine bead into internal corner joints.
- Painting: Wipe down the skirting to remove any dust from sanding. If your covers were pre-primed, you’re ready for your final coats of paint (e.g., satinwood or eggshell). Paint the skirting and enjoy the sharp, clean finish.
Common Mistakes to Avoid When Fitting Skirting Board Covers
- Inaccurate Measuring: Both of the old skirting (leading to buying the wrong size cover) and of the new cuts. Remember: measure twice, cut once.
- Walls Not Being Square: A simple mitre joint will show a gap on non-square walls. Consider learning the coping saw method or be prepared to use flexible filler well.
- Not Using Enough Adhesive: A weak bond will cause the covers to pull away from the wall over time.
- Messy Finishing: Rushed filling and caulking will spoil the final look. Take your time to get clean lines.
- Forgetting to Acclimatise: Can lead to the MDF boards shrinking or expanding after installation, creating gaps.
The Final Result: Enjoying Your New Skirting Board Covers!
Learning how to fit skirting board covers is an incredibly satisfying DIY project that can dramatically transform the look of a room in a single weekend. It provides a modern, clean finish without the disruption, dust, and potential expense of a full replacement. By taking your time with careful measuring, practising your cuts, and being patient with the finishing touches, you can achieve a professional-quality result that will leave you proud of your work.