 Light
Light Grey
Grey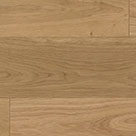 Natural
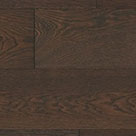 Dark
Dark White
White Light
Light Grey
Grey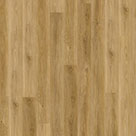 Natural
 Dark
Dark Black
Black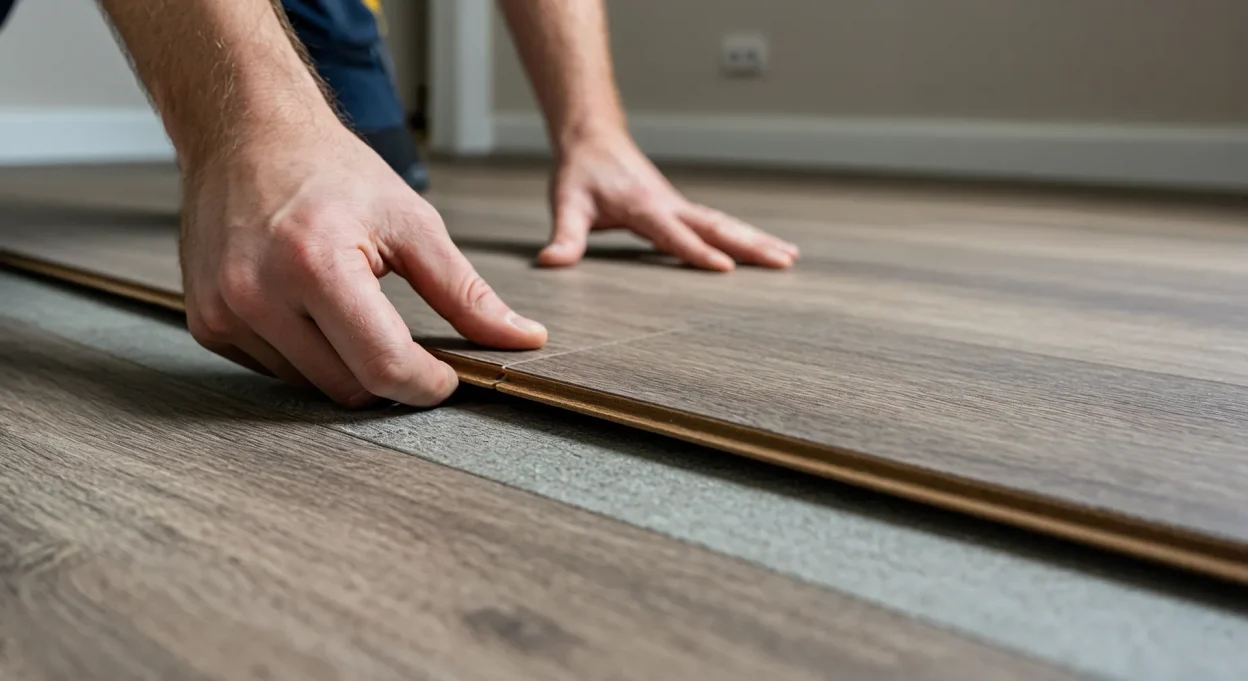
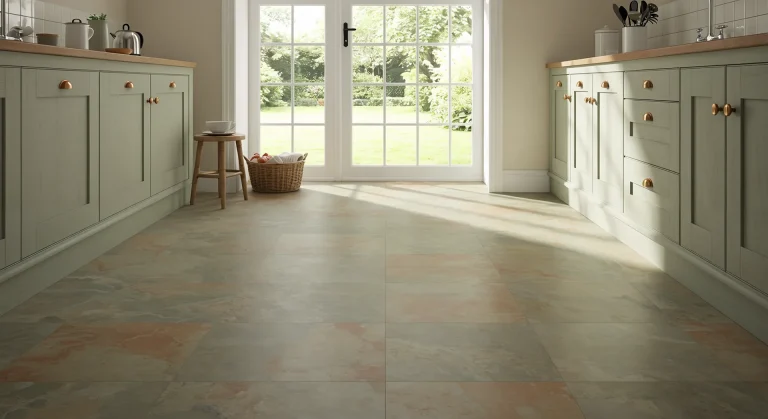
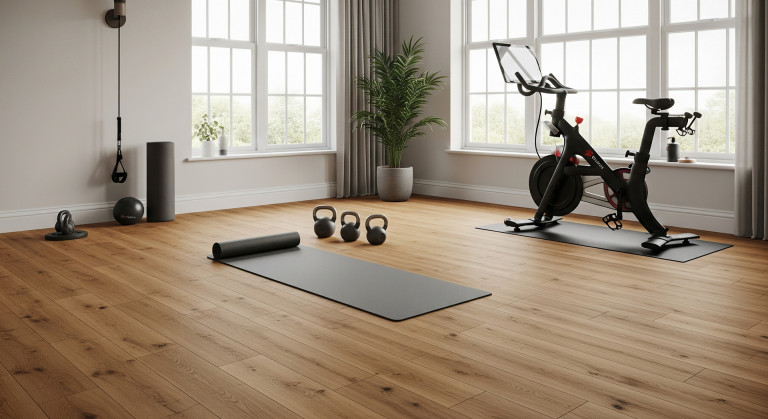
Vinyl click flooring, encompassing both Luxury Vinyl Tile (LVT) and Luxury Vinyl Plank (LVP) formats with click-lock systems, has surged in popularity across the UK – and for excellent reasons. It offers a stunning array of realistic wood and stone designs, combined with impressive durability, water resistance, and perhaps its biggest selling point: DIY-friendly installation. Learning how to lay vinyl click flooring correctly can transform a room quickly and cost-effectively, providing a hard-wearing, stylish finish that’s easy to maintain.
While the click system simplifies the process compared to traditional glue-down methods, achieving a professional, long-lasting result still requires careful planning, thorough subfloor preparation, and attention to detail during fitting. This comprehensive UK guide will walk you through every stage, from understanding the material and gathering your tools to the final finishing touches, ensuring you have the knowledge to successfully install vinyl click flooring in your home.
Jump to Section:
- What Exactly is Vinyl Click Flooring (LVT/LVP)?
- Why Choose a Click System for Your Vinyl Floor?
- Planning Your Vinyl Click Flooring Project: The Essentials
- Your Toolkit: Gathering Supplies for Laying Vinyl Click
- Perfect Prep: Getting Your UK Subfloor Ready for Vinyl Click
- Underlay for Vinyl Click Flooring: Needed or Not? (UK Advice)
- How to Lay Vinyl Click Flooring: Your Step-by-Step Guide
- Finishing Like a Pro: Skirting, Trims, and Thresholds
- Avoid These Pitfalls: Common Vinyl Click Installation Mistakes
- Caring for Your Newly Laid Vinyl Click Floor
What Exactly is Vinyl Click Flooring (LVT/LVP)?
Before diving into how to lay vinyl click flooring, let’s understand the product. It’s a multi-layered floor covering:
- Wear Layer: A tough, clear top coating (usually polyurethane-based) that protects against scratches, scuffs, and stains. Its thickness (measured in mm, e.g., 0.3mm, 0.55mm) indicates durability – thicker is generally better for higher traffic areas.
- Print Layer: A high-resolution photographic layer that realistically mimics wood grain, stone patterns, or other designs.
- Core Layer: Provides stability and structure. Common types include:
– SPC (Stone Plastic Composite): Rigid, dense, highly stable, and waterproof. Often thinner profile. Excellent choice for most areas, including those with temperature fluctuations or potential moisture.
– WPC (Wood Plastic Composite): Thicker, often includes foaming agents for added comfort and sound insulation. Still highly water-resistant/waterproof but might be slightly less rigid than SPC.
– Rigid Core: A general term often encompassing SPC and similar dense core constructions. - Backing Layer: Provides foundational support and sometimes includes a pre-attached underlay.
Available in tile (LVT) or plank (LVP) formats, the ‘click’ part refers to the interlocking edges that allow for glue-free installation.
Why Choose a Click System for Your Vinyl Floor?
The click-lock mechanism is a primary reason for vinyl click’s popularity, especially for DIY projects:
- DIY Friendly: Significantly easier and faster to install than glue-down vinyl, requiring fewer specialist tools and skills.
- No Messy Adhesives: Avoids the need for spreading glue, reducing mess and drying/curing times.
- Floating Floor: The floor isn’t fixed to the subfloor, allowing for slight movement and easier installation over some existing hard floors.
- Easy Repairs: Damaged planks or tiles can often be individually replaced more easily than with glue-down floors.
- Immediate Use: Once laid, the floor is typically ready for foot traffic immediately.
Planning Your Vinyl Click Flooring Project: The Essentials
Good planning is crucial for a smooth installation when learning how to lay vinyl click flooring:
- Measure Carefully: Calculate the room’s square meterage (Length x Width).
- Order Materials: Add 5-10% extra flooring for cutting waste (straightforward rooms might only need 5%, complex shapes or patterns closer to 10%). Check all packs share the same batch number for colour consistency. Order any necessary underlay, trims, and tools simultaneously.
- Acclimatisation: Vinyl click flooring still needs to acclimatise to your room’s environment. Although often less critical than wood, leave the unopened boxes flat in the installation room for at least 24-48 hours (always check the specific manufacturer’s instructions). This helps prevent issues after fitting, especially in the variable UK climate.
- Read Manufacturer Instructions: These are paramount! They detail specific requirements for your chosen product regarding expansion gaps, underlay, cutting, and locking mechanisms. Following them protects your warranty.
Your Toolkit: Gathering Supplies for Laying Vinyl Click
You don’t need highly specialised tools, but having the right ones makes the job much easier:
- Tape Measure & Pencil
- Safety Glasses & Gloves
- Knee Pads
- Utility Knife (heavy-duty, with spare sharp blades) OR Vinyl Tile/Plank Cutter
- Spacers (check manufacturer’s recommended gap size, often 5-8mm for vinyl click)
- Tapping Block (use one compatible with vinyl click – sometimes a specific plastic type is recommended over wood)
- Rubber Mallet (white rubber preferred to avoid marking)
- Pull Bar (for closing gaps on the last plank in a row)
- Carpenter’s Square / Combination Square
- Level (long spirit level or laser level)
- Broom / Vacuum Cleaner
- Moisture Meter (especially for concrete subfloors)
- Tools for removing/refitting skirting (pry bar, hammer)
- Hand Saw or Multi-tool (for undercutting door frames)
- (Optional) Profile Gauge / Contour Gauge (for awkward shapes)
Perfect Prep: Getting Your UK Subfloor Ready for Vinyl Click
A clean, dry, smooth, and level subfloor is non-negotiable for a good vinyl click installation. Imperfections will show through or cause problems later.
General Requirements:
- Clean: Vacuum thoroughly. Remove all debris, dust, paint blobs, old adhesive residue.
- Dry: Check moisture levels, especially on concrete. UK ground floors often need a Damp Proof Membrane (DPM) on concrete unless integral to the slab. Moisture can get trapped under vinyl.
- Level/Smooth: This is critical. Check with a long straight edge. Generally, deviations should be less than 3mm over 1-2 metres (check manufacturer specifics). Vinyl click is less forgiving of bumps than thicker flooring.
Concrete Subfloors:
- Fill cracks/holes with appropriate patching compound.
- If uneven beyond minor smoothing, use a suitable self-levelling compound. Allow it to cure completely (can take days).
- Install a DPM (e.g., 1000+ gauge polyethylene sheeting or liquid membrane) if required based on moisture readings or ground floor location, unless your underlay provides this.
Wooden Subfloors (Floorboards/Chipboard/Plywood):
- Securely screw down any loose boards to prevent movement and squeaks.
- Replace any damaged sections.
- Sand down high spots or uneven joints.
- For old floorboards or uneven chipboard, overlaying with flooring-grade plywood (minimum 6mm), screwed down every 150mm across the board and at edges, creates the necessary smooth, stable surface. Do not install directly over cushioned vinyl or carpet.
Underlay for Vinyl Click Flooring: Needed or Not? (UK Advice)
This causes confusion! Here’s the breakdown for installing vinyl click flooring:
- Check Product Specs: Many modern vinyl click floors (especially SPC/Rigid Core) come with a pre-attached underlay layer. If yours does, do not add another layer unless explicitly permitted by the manufacturer (this is rare). Doubling up can make the floor too ‘spongy’ and damage the locking system.
- If No Pre-attached Underlay: You may need one. Use only thin, dense underlays specifically designed for LVT/LVP click systems. Standard laminate underlay is usually too thick and compressible. Benefits include minor subfloor smoothing, sound reduction, and added comfort.
- Concrete Subfloors: If your vinyl click doesn’t have attached underlay and you need a moisture barrier, use a thin LVT/LVP underlay with an integrated DPM, or lay a separate DPM sheet first.
- Underfloor Heating (UFH): Ensure both the flooring and any separate underlay used are certified compatible with UFH systems. They need low thermal resistance (low Tog rating).
Installation (if using separate underlay): Follow the same steps as for engineered wood underlay – lay perpendicular to planks, butt edges, tape seams.
How to Lay Vinyl Click Flooring: Your Step-by-Step Guide
Now for the main event – laying the vinyl click flooring:
(Always prioritise your specific product’s instructions)
- Plan Direction & Starting Point: Decide plank direction (usually parallel to the longest wall). Plan your layout to avoid very narrow (<5cm) planks at the finishing wall; you might need to trim the width of your first row to ensure the last row is a decent size. Choose your starting wall (often the longest, straightest one).
- Expansion Gaps: Place spacers against the starting wall and side walls according to manufacturer guidance (e.g., 5-8mm). This gap is crucial for expansion and contraction, even with stable vinyl click.
- First Row: Lay the first plank in a corner, ensuring the correct edge (usually groove) faces the wall spacers. Connect the next plank on the short end, ensuring it’s perfectly aligned and the joint is tight. Continue across the room.
- Cutting: Understanding how to cut vinyl click flooring is a key part of a successful installation.Vinyl click can often be cut by scoring deeply several times with a sharp utility knife against a square, then snapping the plank. Thicker rigid core planks might require a saw (use a fine-toothed blade for clean cuts). Cut the last piece of the first row to size, remembering the expansion gap.
- Subsequent Rows & Staggering: Start the second row with the offcut from the first row (if it’s a reasonable length – typically >20-30cm, check instructions). This naturally staggers joints. Staggering joints between rows is essential for stability and appearance – aim for at least 20-30cm offset.
- Locking Planks: Engage the long edge of the new plank into the previous row, typically at an angle, then lower it flat. The short end should then align with the previous plank in its own row. Gently tap along the long joint with a mallet and tapping block if needed to ensure it’s fully engaged. Lock the short ends together (methods vary – some push down, some require light tapping). Do not force joints. If it’s not locking easily, check for debris or misalignment.
- Continue Across Floor: Work row by row, maintaining the stagger pattern and expansion gaps on all sides. Mix planks from different boxes as you go to blend any minor shade variations.
- Obstacles:
– Door Frames: Undercut the frame/architrave so the flooring can slide underneath neatly.
– Pipes: Measure carefully, drill holes slightly larger than the pipe diameter for expansion, and cut a line from the hole to the plank edge. Fit the plank and cover gaps with pipe surrounds (rosettes). - Final Row: Measure the gap to the wall (minus expansion gap). You will likely need to cut planks lengthwise (rip cut). This can be tricky; take your time. Use the pull bar carefully to lever the last row into place.
Finishing Like a Pro: Skirting, Trims, and Thresholds
Once the entire floor is laid:
- Remove Spacers: Once the entire floor is laid.
- Install Trim: Re-fit original skirting boards or install new ones. Alternatively, use colour-matched scotia beading or quadrant trim fixed to the wall/skirting, not the floor. This covers the expansion gap while allowing movement.
- Thresholds: Use appropriate transition strips at doorways or where the vinyl meets different flooring types (carpet, tiles). Ensure these don’t restrict floor movement where an expansion gap is needed underneath.
Avoid These Pitfalls: Common Vinyl Click Installation Mistakes
Learning how to lay vinyl click flooring also means knowing what not to do:
- Bad Subfloor Prep: Unevenness will show and can cause clicking/joint failure.
- Skipping Acclimatisation: Can lead to buckling or gapping later.
- Forgetting/Insufficient Expansion Gaps: The #1 cause of buckling. Don’t skip spacers!
- Using Incorrect Underlay (or Double Underlay): Causes instability and joint stress.
- Not Staggering Joints Properly: Weakens the floor and looks poor.
- Forcing Joints: Damages the locking mechanism. Ensure planks are aligned correctly.
- Cutting Errors: Measure twice, cut once!
Caring for Your Newly Laid Vinyl Click Floor
- Initial Clean: Sweep or vacuum thoroughly, then give it a light clean with a damp mop and pH-neutral vinyl cleaner to remove any installation dust.
- Protection: Place felt pads under all furniture immediately. Use doormats at entrances. Avoid rubber-backed mats which can discolour vinyl over time.
- Regular Maintenance: Follow routine cleaning steps (sweep, damp mop). Refer to a detailed vinyl floor cleaning guide for long-term care.
Conclusion
Learning how to lay vinyl click flooring is well within the reach of most UK DIYers. Its forgiving click-lock system, water resistance, and durability make it an excellent choice. The keys to success are thorough planning, meticulous subfloor preparation, allowing time for acclimatisation, leaving adequate expansion gaps, and carefully following the manufacturer’s instructions for your specific product. By taking your time and using the right techniques outlined in this guide, you can confidently install vinyl click flooring that looks fantastic and performs brilliantly for years. Enjoy your beautiful, practical new floor!