 Light
Light Grey
Grey Natural
 Dark
Dark White
White Light
Light Grey
Grey Natural
 Dark
Dark Black
Black
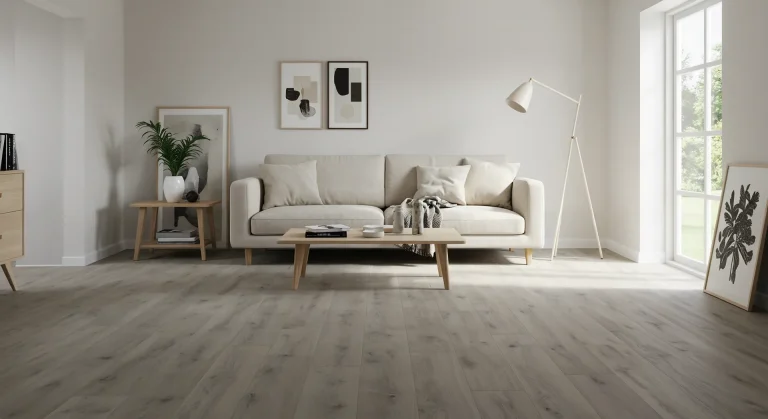
You’ve laid your beautiful new laminate floor, the planks are clicked together perfectly, and the room is already transformed. But there’s one last, crucial detail to attend to: that unavoidable gap around the edge of the room. This isn’t a mistake; it’s the essential expansion gap that allows your floor to breathe. So, how do you cover it for a clean, professional finish? The answer is beading for laminate flooring.
Fitting floor trim, often called scotia or quadrant beading, is the final step that elevates a good DIY job into a great one. While it might seem intimidating, especially when tackling corners, it’s a very achievable skill for beginners. This step by step UK guide for 2025 will show you exactly how to measure, cut, and fit beading for laminate flooring to achieve a flawless, seamless result that perfectly frames your new floor.
Jump to Section:
- What is Beading for Laminate Flooring (and Why Do I Need It)?
- Choosing the Right Beading: Colour, Profile, and Material
- Your Toolkit: Essential Tools and Materials for the Job
- Planning and Measuring for a Perfect Result
- Step by Step: How to Cut Your Laminate Beading
- Step by Step: How to Fix Beading for Laminate Flooring
- Finishing Touches for a Professional Look
- Your Guide to Flawless Beading for Laminate Flooring
What is Beading for Laminate Flooring (and why do I need it)?
When you install a laminate floor, you must leave an expansion gap of around 8-12mm around the entire perimeter of the room. This allows the floor’s HDF (High-Density Fibreboard) core to naturally expand and contract with changes in temperature and humidity without buckling. Beading for laminate flooring is a decorative moulding designed specifically to cover this gap.
It sits at a right angle, resting one edge on the floor and the other flat against the skirting board. It is fixed to the skirting board, not the floor, which is a critical point. This allows the laminate floor underneath to “float” and move freely as intended. The alternative is to remove, refit, and redecorate all your skirting boards on top of the new floor, a much larger and messier job. Beading is the faster, cleaner, and more popular DIY solution.
Choosing the Right Beading: Colour, Profile, and Material
Before you start, you need to select the right trim for your project.
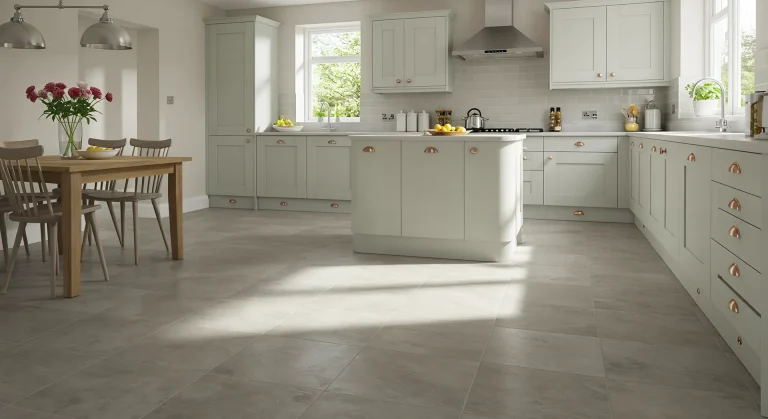
Colour Matching:
- Matching the Floor: Most laminate flooring manufacturers in the UK offer exact colour-matched beading for their products. This creates a seamless look where the trim blends in with the floor.
- Matching the Skirting: White or paintable beading is a very popular choice. When fixed against white skirting boards and painted the same colour, it creates the illusion that the skirting board itself is thicker and runs right down to the floor, a very clean and classic look.
- Contrast: You could also choose a contrasting colour for a deliberate design feature, though this is less common.
Profile (Shape):
- Scotia: This is the most popular profile for beading for laminate flooring. It has a concave (curved inwards) profile.
- Quadrant: Similar to scotia but with a convex (curved outwards) profile, like a quarter of a circle. The choice between scotia and quadrant is purely aesthetic.
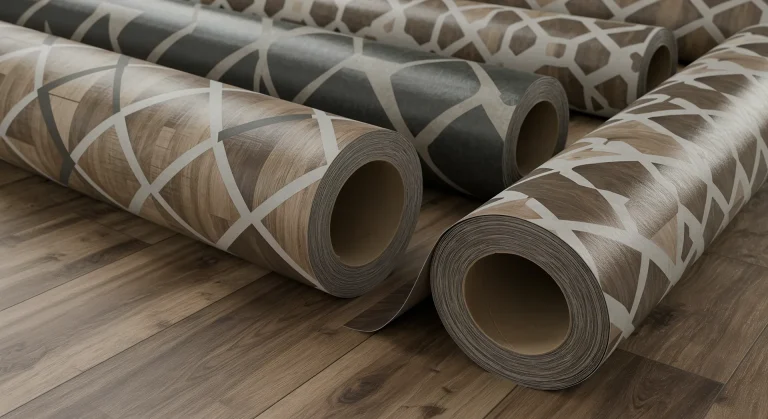
Material:
- MDF with a foil wrap: This is the most common type. The MDF core is wrapped in a paper or vinyl foil that is printed to match a specific wood effect or colour.
- Solid Wood: Available for use with real wood floors but can also be used with laminate. It’s more expensive and can be harder to cut cleanly.
- Plastic/UPVC: A durable and waterproof option, often used in bathrooms or kitchens where water-resistant laminate has been installed.
Your Toolkit: Essential Tools and Materials for the Job
Having the right tools will make all the difference between a frustrating experience and a satisfying one.
- Measuring & Marking: Tape Measure, Pencil, Combination Square.
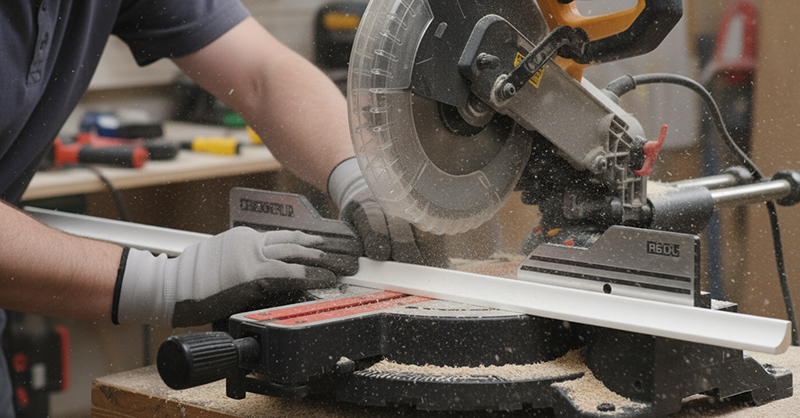
- Cutting: A mitre saw is the best tool for the job, providing fast, accurate angle cuts. However, a fine-toothed hand saw and a mitre box is a perfectly good and affordable alternative for DIYers.
- Fixing: A caulking gun is essential. For fixing, you have two main options:
– Adhesive Only: A strong grab adhesive.
– Adhesive and Pins: A grab adhesive plus panel pins and a hammer/nail punch. - Materials:
– Your chosen beading for laminate flooring.
– Strong Grab Adhesive: Look for a high-strength, solvent-free type.
– (Optional) Panel Pins: 25-30mm long.
– Decorator’s Caulk: For sealing the top edge.
– Colour-Matched Filler or Wax Stick: For filling corner gaps or nail holes.
Planning and Measuring for a Perfect Result
The old carpenter’s adage, “measure twice, cut once,” is your golden rule.
- Calculate Quantity: Measure the total perimeter of your room. Add 10-15% to this figure to allow for cutting waste and any mistakes. It’s always better to have an extra length than to be one piece short.
- Plan Your Cuts: Start on the longest wall. Think about where your joints will fall if a wall is longer than a single piece of beading. It’s often best to work your way around the room in one direction (e.g., clockwise).
- Check Your Angles: Don’t assume your walls are perfectly square! Older UK houses, in particular, often have internal and external corners that are not a perfect 90 degrees. An angle finder can be helpful, or you can use offcuts to test your mitre cuts before cutting your main pieces.
Step by Step: How to Cut Your Laminate Beading
This is the part that requires the most precision. Always wear safety glasses when cutting.
For Straight Internal Walls (Joining two pieces):
If a wall is longer than one length of beading, use a ‘scarf joint’ for a less visible join. Cut the ends of both pieces at opposing 45 degree angles so they overlap neatly, rather than just butting them together with a square cut.
For Internal Corners (90 degrees):
This is the most common corner cut. You are creating a mitre joint.
- Measure: Measure from the corner along the wall to the desired length.
- Position in Mitre Box/Saw: Place the beading in your mitre box or on your mitre saw exactly as it will sit between the floor and the wall (flat back against the vertical side, flat bottom on the base).
- Cut the First Piece: For the piece on the left wall of the corner, you will make a 45 degree cut from right to left. The face of the beading will be the longest point.
- Cut the Second Piece: For the piece on the right wall, you will make the opposing 45 degree cut, from left to right.
- Test the Fit: Push the two pieces together in the corner. They should form a neat point.
For External Corners (90 degrees):
The principle is the same, but the angles are reversed.
- Measure: Measure from the wall end up to the point of the corner.
- Position: Again, place the beading as it will sit on the wall.
- Cut: This time, the cuts will be made so that the back of the beading is the longest point, allowing it to wrap around the outside corner. The face of the beading will be the shortest point. Test the fit.
Step by Step: How to Fix Beading for Laminate Flooring
With your pieces cut, it’s time to fix them in place.
- Dry Fit First: Always offer up your cut piece to the wall to double check the fit before applying any adhesive.
- Apply Adhesive: Using the caulking gun, apply a continuous bead of strong grab adhesive along the back edge of the beading that will stick to the skirting board. You can add a second, smaller bead to the bottom back edge if you wish, but the main bond is with the skirting. Do not apply adhesive to the bottom face that touches the floor.
- Press into Place: Firmly press the beading against the skirting board, ensuring it is also pushed down tight against the laminate floor. Hold it for a moment to allow the grab adhesive to take hold.
- (Optional) Pinning for Extra Security: For an even stronger fix, you can use panel pins. While the adhesive is still wet, hammer a panel pin through the beading and into the skirting board at an angle. Use a nail punch to knock the head of the pin just below the surface. Place pins every 30-40cm.
Work your way around the room, piece by piece.
Finishing Touches for a Professional Look
This final stage turns a good job into a great one.
- Fill Gaps and Holes: Use a colour-matched filler or wax stick to fill any small gaps in your mitre joints and to cover the recessed panel pin heads. Wipe away any excess for a clean finish.
- Caulk the Top Edge: For a truly seamless, professional look (especially if using white beading against white skirting), apply a thin, neat bead of decorator’s caulk along the top edge where the beading meets the skirting board. Smooth it with a wet finger or a caulking tool. This hides any minor imperfections or gaps against the wall.
- Painting: If you’ve used paintable beading, now is the time to apply your final coat of paint for a perfect match with your skirting.
Your Guide to Flawless Beading for Laminate Flooring
Fitting beading for laminate flooring is a project that delivers immense satisfaction. It’s the finishing touch that frames your new floor, hides the necessary expansion gap, and gives your room a sharp, completed look. By taking your time to measure accurately, making precise cuts, and using a combination of adhesive and pins for a secure fix, any UK DIYer can achieve a professional-quality result. Don’t rush the corners and be patient with the finishing; it’s these details that truly make your new laminate flooring installation shine.