 Light
Light Grey
Grey Natural
 Dark
Dark White
White Light
Light Grey
Grey Natural
 Dark
Dark Black
Black
The timeless elegance of the herringbone pattern, with its distinctive V-shaped arrangement, has graced sophisticated interiors for centuries. Once a hallmark of grand wooden parquet, this coveted design is now brilliantly reimagined for modern UK homes with herringbone vinyl flooring. Combining the classic visual appeal of traditional parquet with the outstanding performance and versatility of Luxury VinylTile (LVT) and Luxury Vinyl Plank (LVP), it offers a stunning, practical, and often affordable flooring solution.
If you’re looking to infuse your space with character, depth, and a touch of luxury that stands up to the rigours of daily life, herringbone vinyl flooring is an exceptional choice. This ultimate UK guide for 2025 explores everything you need to know – from understanding the material and its myriad benefits (including its crucial waterproof properties) to choosing styles, planning installation, considering costs, and ensuring long-lasting beauty.
Jump to Section:
- What is Herringbone Vinyl Flooring? (Decoding LVT & LVP for This Classic Pattern)
- The Enduring Elegance: Why UK Homes are Falling for Herringbone Vinyl
- Click or Glue? Choosing Your Herringbone Vinyl Installation System
- Designing with Flair: Popular Styles & Colours in Herringbone Vinyl Flooring
- Planning Your Parquet-Style Perfection: Before You Begin
- Essential Toolkit for Your Herringbone Vinyl Flooring Project
- The Underlay Question: Is It Needed for Click Herringbone Vinyl?
- Mastering the V: Key Steps for Laying Your Herringbone Vinyl Pattern
- Flawless Finishes: Skirting, Trims, and Thresholds for Vinyl
- Simple Care for Lasting Beauty: Maintaining Herringbone Vinyl Floors
- What to Budget: Herringbone Vinyl Flooring Costs in the UK (2025)
- Herringbone Vinyl Flooring: The Smart & Stylish Choice for Your Home?
What is Herringbone Vinyl Flooring? (Decoding LVT & LVP for This Classic Pattern)
Herringbone vinyl flooring isn’t a single sheet material with a printed pattern; rather, it consists of individual Luxury Vinyl Tiles (LVT) or Luxury Vinyl Planks (LVP) specifically sized and designed to be laid in the classic herringbone arrangement. This creates an authentic patterned floor with distinct blocks.
The construction of these LVT/LVP products is typically multi-layered:
- Protective Wear Layer: A transparent, highly robust top coating (usually polyurethane, often enhanced with ceramic beads or aluminium oxide) that defends against scratches, scuffs, stains, and fading. Wear layer thickness (e.g., 0.3mm, 0.55mm, 0.7mm) is a key indicator of durability.
- Decor Layer: A high-definition photographic film providing the realistic wood grain (like oak, walnut) or stone effect design.
- Core Layer: This provides the plank’s structure, stability, and often its waterproof properties. Common in herringbone vinyl flooring are:
– SPC (Stone Plastic Composite) / Rigid Core: An extremely dense and stable core made from limestone powder and PVC. It’s 100% waterproof and highly resistant to impacts and temperature changes, making it a popular choice in the UK.
– WPC (Wood Plastic Composite): Contains wood fibres/flour with PVC, often with foaming agents for a slightly softer, quieter feel. Also highly water-resistant or waterproof. - Backing Layer: Provides balance and foundational support. Many modern rigid core click vinyl products designed for herringbone installation now include a pre-attached underlay (e.g., IXPE foam), simplifying installation and adding comfort.
This construction sets it apart from traditional wood herringbone (which is solid wood) and laminate herringbone (which has a moisture-sensitive HDF core).
The Enduring Elegance: Why UK Homes are Falling for Herringbone Vinyl
The surge in popularity of herringbone vinyl flooring in the UK is no surprise. It offers a compelling array of advantages:
- Sophisticated Aesthetics: The herringbone pattern instantly adds a sense of luxury, visual interest, and timeless style to any room, from classic to contemporary.
- The Waterproof Advantage: Most high-quality LVT/LVP herringbone is 100% waterproof, making it an ideal choice for any room in the house, including moisture-prone areas like kitchens, bathrooms, utility rooms, and entrance halls. This is a massive benefit for busy UK households and even coastal homes where dampness or tracked-in moisture can be a concern.
- Exceptional Durability: With tough wear layers, it’s highly resistant to scratches, dents, stains, and scuffs – perfect for homes with children, pets, and heavy foot traffic.
- Ease of Maintenance: Requires only simple, regular cleaning – sweeping/vacuuming and damp mopping with a pH-neutral cleaner is usually all that’s needed.
- Design Versatility: Available in a vast range of incredibly realistic wood effects (various oaks, walnuts, greys being UK favourites) and stone finishes, fitting diverse interior design schemes.
- Comfort and Acoustics: Generally warmer and quieter underfoot than ceramic tiles or some standard laminates, especially WPC core products or those with integrated underlay.
- Underfloor Heating (UFH) Compatibility: Most herringbone vinyl flooring is suitable for use with embedded UFH systems, enhancing comfort in UK homes.
- Installation Options: Offers both DIY-friendly click systems and highly stable glue-down methods.
Click or Glue? Choosing Your Herringbone Vinyl Installation System
When selecting herringbone vinyl flooring, you’ll primarily choose between two installation systems:
Click LVT/LVP Herringbone:
- How it Works: Planks or tiles feature precisely milled interlocking edges that ‘click’ together to form a ‘floating floor’ over an underlay (if not pre-attached). Many herringbone-specific click systems use designated ‘A’ and ‘B’ planks for correct pattern formation.
- Pros: Significantly easier and faster for DIY installation, no messy adhesives, can often be installed over existing level hard floors, easier to replace individual damaged planks.
- Cons: Requires a very level and smooth subfloor to prevent stress on the click joints; can feel slightly less solid than glue-down if the subfloor isn’t perfect or a very thin underlay is used.
Glue-Down LVT/LVP Herringbone:
- How it Works: Individual planks/tiles are fully adhered to the subfloor using a specialist vinyl flooring adhesive.
- Pros: Creates an extremely stable and solid-feeling floor, ideal for very large areas, conservatories (due to temperature stability), or for creating intricate designs with borders and feature strips.
- Cons: Subfloor preparation must be immaculate (perfectly smooth, level, clean, and dry); installation is more complex, time-consuming, and typically requires professional expertise, which adds to the overall cost; more difficult to replace individual pieces if damaged.
For most UK DIY enthusiasts, click herringbone vinyl flooring is the more accessible and popular choice.
Designing with Flair: Popular Styles & Colours in Herringbone Vinyl Flooring
The design potential with herringbone vinyl flooring is vast:
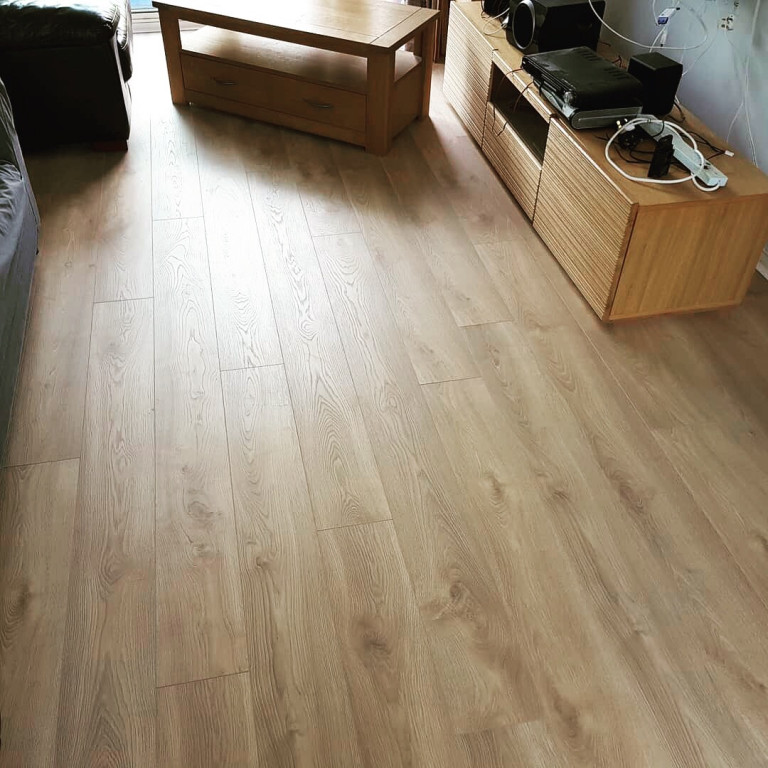
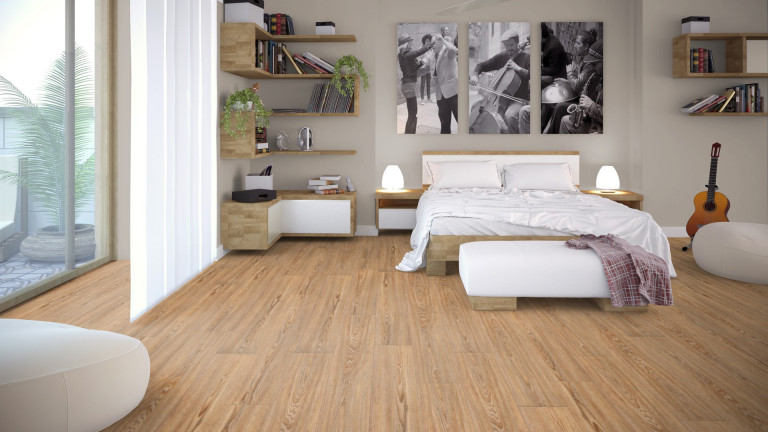
- Wood Effects: Oak remains a dominant choice in the UK, offered in finishes from light, airy Scandinavian whites and pale natural oaks to classic mid-tones, popular greys, and rich, dark walnuts or smoked oaks. The realism achieved by brands like Karndean, Amtico, and Quick-Step is exceptional.
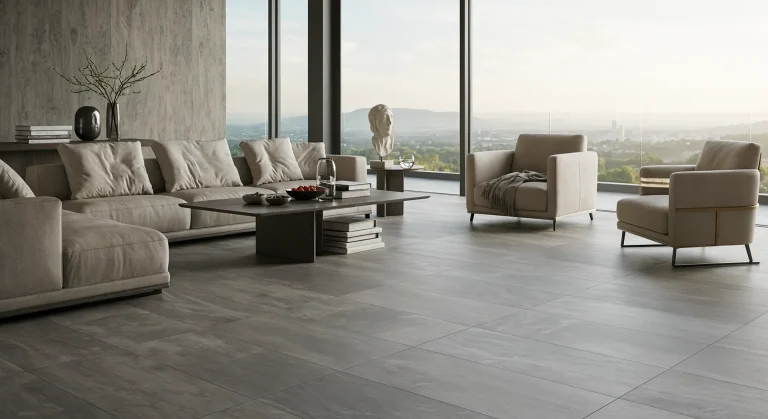
- Stone Effects: While less common for herringbone, some LVT tile formats offer slate, travertine, or concrete effects that can create a unique and modern patterned floor.
- Plank/Tile Size: Herringbone vinyl typically uses smaller planks/tiles (e.g., 100-150mm wide x 500-750mm long) to achieve the intricate pattern effectively. Consider the scale of your room; smaller planks in a large room can look very detailed, while slightly larger herringbone planks might be used for a bolder statement.
- Texture and Finish: Look for “Registered Embossed” LVT where the surface texture aligns with the printed wood grain or stone pattern – this dramatically enhances realism. Matt finishes are very popular in the UK for a contemporary look that also helps hide minor scuffs.
- Pattern Direction: The ‘points’ of the herringbone ‘V’ can be oriented to lead the eye towards a focal point (like a fireplace or window) or to make a room feel wider or longer.
Planning Your Parquet-Style Perfection: Before You Begin
Meticulous planning is the cornerstone of a successful herringbone vinyl flooring installation:
- Measure Accurately: Calculate your room’s area (Length x Width in m²). For the herringbone pattern, add 10-15% to this figure for cutting waste – the angled cuts inevitably lead to more offcuts.
- Order & Check Batches: When ordering, ensure all packs are from the same batch/production run to avoid subtle colour or sheen variations.
- Acclimatisation: Vinyl flooring, especially rigid core types, should acclimatise to your room’s normal living conditions. Lay the unopened boxes flat in the installation room for at least 24-48 hours (always check the manufacturer’s specific guidance).
- Subfloor Preparation (Crucial!): The subfloor must be spotlessly clean, completely dry, structurally sound, and critically, very level and smooth. Vinyl will telegraph subfloor imperfections.
– Concrete: Check for moisture (a DPM is usually essential for ground-floor concrete in the UK). Fill cracks/holes. Use a self-levelling compound for any unevenness exceeding manufacturer tolerances (often max 2-3mm over 2m).
– Wooden Floorboards: Secure loose boards. Sand high spots. An overlay of flooring-grade plywood (minimum 6mm) is highly recommended to create a consistently smooth, stable base. - Read Manufacturer Instructions: Your specific product’s fitting guide is your ultimate reference and will detail exact requirements for expansion gaps, underlay, and locking mechanisms.
Essential Toolkit for Your Herringbone Vinyl Flooring Project
- Sharp Heavy-Duty Utility Knife (with plenty of spare blades)
- Straight Edge / Carpenter’s Square / Combination Square
- Tape Measure & Pencil
- Spacers (check manufacturer’s recommended size for expansion gaps, typically 5-8mm for vinyl click)
- Rubber Mallet (white to avoid marking floors)
- Tapping Block (vinyl-specific if possible, or a clean offcut)
- Pull Bar (for final planks in rows)
- Chalk Line (essential for marking centre lines for herringbone layout)
- Gloves & Safety Glasses
- Knee Pads
- (Optional) Vinyl Tile Cutter (guillotine style – available for hire in UK)
- (Optional) Jigsaw with fine-tooth blade (for curves/notches)
- (For Glue-Down) Appropriate Vinyl Adhesive, Notched Trowel, Heavy Floor Roller.
The Underlay Question: Is It Needed for Click Herringbone Vinyl?
- Built-in Underlay: Many modern SPC/Rigid Core herringbone vinyl flooring products, widely available in the UK, come with a pre-attached underlay (e.g., IXPE foam). If your product has this, do not add another separate underlay unless explicitly permitted by the manufacturer, as this can over-soften the installation and stress the click joints.
- No Attached Underlay: If your chosen vinyl click doesn’t have an integrated backing, a thin, dense LVT-specific underlay (typically 1mm-1.5mm thick) is often recommended. This can provide minor subfloor smoothing, some sound reduction, and a touch more comfort.
- UFH Compatibility: Always ensure both the flooring and any separate underlay are certified compatible with your underfloor heating system.
Mastering the V: Key Steps for Laying Your Herringbone Vinyl Pattern
(This provides key insights; always default to your specific manufacturer’s detailed installation manual, especially for starting triangles or A/B plank systems.)
- Establish Centre Lines: This is paramount for a balanced herringbone layout. Find the exact centre of your room and snap perpendicular chalk lines. These are your non-negotiable guides.
- Plan Your Start: Dry lay several planks (A/B if applicable) along your chalk lines to establish the precise starting point of your first ‘V’s or reference triangles. Ensure this starting configuration is perfectly square and centred. Detailed guides from manufacturers like Topps Tiles or Wood and Beyond often show specific methods for creating these initial reference points.
- Lay First Rows: Place expansion spacers (typically 5-8mm for vinyl) around the perimeter. Carefully lay your first interlocked planks or assembled starting triangles exactly along your guidelines, following the manufacturer’s instructions for engaging the click-lock mechanism (often an angle-and-drop system).
- Maintain Pattern & Alignment: Work outwards, row by row, meticulously following the A/B plank sequence if your system requires it, or the universal click logic to build the herringbone pattern. Constantly check that your ‘V’ points stay aligned with your chalk lines.
- Cutting: For straight cross-cuts, score deeply with a very sharp utility knife against a square and then snap the plank. A vinyl tile cutter (guillotine) provides cleaner, faster cuts. For curves, notches (e.g., around pipes or architraves), a jigsaw with a fine-tooth blade (for plastics/laminates) is best. Remember to account for expansion gaps when cutting pieces near walls or fixed objects.
- Expansion Gaps: Continuously maintain the recommended expansion gap around all walls and any fixed obstacles (pipes, kitchen islands, door frames).
Flawless Finishes: Skirting, Trims, and Thresholds for Vinyl
- Once the floor is fully laid, remove all expansion spacers.
- Install skirting boards or scotia/beading trim around the room’s perimeter. These must be fixed to the wall or existing skirting, ensuring they cover the expansion gap but do not pin down the floating vinyl floor.
- Use appropriate threshold strips (transition bars) in doorways or where the herringbone vinyl flooring meets a different floor covering, ensuring these also allow for any necessary movement.
Simple Care for Lasting Beauty: Maintaining Herringbone Vinyl Floors
Herringbone vinyl flooring is remarkably easy to look after:
- Sweep or vacuum regularly (use a hard floor setting or soft brush attachment) to remove loose dirt and grit.
- Wipe up spills promptly – although waterproof, it’s good practice.
- For general cleaning, damp mop with a well-wrung microfibre mop using plain water or a pH-neutral cleaner specifically recommended for LVT/vinyl floors.
- Avoid: Abrasive cleaners, scouring pads, wax-based polishes (unless part of a specific LVT care system), oil soaps, strong solvents, and generally, steam mops (always check manufacturer guidelines, as prolonged high heat/steam can sometimes affect edges or adhesives over time).
- Use felt pads under furniture legs to prevent scratches.
- Use non-staining doormats at entrances (avoid rubber-backed mats, which can sometimes react with vinyl).
What to Budget: Herringbone Vinyl Flooring Costs in the UK (2025)
- Material Cost: For herringbone LVT/LVP, expect to pay approximately £20 to £60+ per square metre in the UK. Budget-friendly options are available, while premium brands like Karndean or Amtico, or those with thicker wear layers and more complex embossing, will be at the higher end.
- Underlay (if not built-in): Add around £3-£7 per m².
- Installation Labour (if not DIY): Professional fitting for click LVT herringbone might range from £15-£25+ per m². Glue-down LVT herringbone is more intricate and may cost £20-£35+ per m². Rates vary regionally.
- Overall: While herringbone vinyl is usually a step up in price from standard plank LVT, it’s generally a more cost-effective way to achieve the herringbone look compared to engineered wood or solid wood parquet, especially considering the simpler DIY potential for click systems.
Herringbone Vinyl Flooring: The Smart & Stylish Choice for Your Home?
For UK homeowners seeking the enduring sophistication of the herringbone pattern combined with cutting-edge practicality, herringbone vinyl flooring is an exceptional solution. Its waterproof nature makes it a fearless choice for any room, including kitchens and bathrooms where traditional wood parquet would be a liability. Add to this its impressive durability, vast range of stunningly realistic designs, ease of maintenance, and compatibility with underfloor heating, and it’s clear why LVT/LVP herringbone is a leading trend for 2025.
Whether you’re in a bustling city, a family home with pets and children, or a coastal property where resilience to moisture and easy cleaning is prized, herringbone vinyl flooring delivers. While it doesn’t offer the unique organic feel of real wood, its benefits provide a compelling blend of high-end style and everyday liveability, making it a smart and beautiful investment for contemporary UK interiors.